
Key Takeaways
To set up and activate your iPhone 18 Pro or 18 Pro Max, connect to Wi-Fi, use Quick Start or manual setup, and activate your carrier’s eSIM. These models do not accept physical SIM cards. Transfer your apps and data separately from your phone number, then test calls, texts, and mobile data. Your carrier must support your device and the activation method you choose.
Your new iPhone needs both personal setup and working cellular service. This guide helps you choose a transfer method, activate your number, and check that everything works.
Part 1: Prepare Your iPhone, Account, and Backup
A little preparation helps you avoid missing passwords, failed transfers, and a phone that works on Wi-Fi but cannot receive calls.
Know What “Setup” and “Activation” Mean
Setup adds your account, security settings, apps, and personal data. Cellular activation connects your phone number and service plan to the new phone.
These tasks can happen during the same setup session, but completing one does not prove the other is finished. Seeing your photos or opening a website over Wi-Fi does not confirm that your mobile line works.
The US iPhone 18 Pro and Pro Max use eSIM, with no physical SIM support. An eSIM is a digital SIM that your carrier installs on the phone. Apple confirms this in its iPhone 18 Pro specifications and Pro Max specifications.
Have These Essentials Ready
Before you start, gather:
- A reliable Wi-Fi connection and its password.
- Power for your new phone and any device you are transferring from.
- Your Apple Account sign-in details and access to verification codes.
- Your old phone’s passcode, if using it for a transfer.
- A current backup of important data.
- Your carrier login, account PIN, or activation instructions.
- A carrier-issued QR code, if that is your provider’s activation method.
If you are changing carriers and keeping your number, ask the new carrier which transfer details it needs. For example, Verizon’s number-transfer guide lists the old account number and Number Transfer PIN. Keep your existing service active until the number transfer is complete.
Check Carrier Lock Before Switching Networks
A locked iPhone can use service from the carrier that locked it. You need an unlock to use a different carrier.
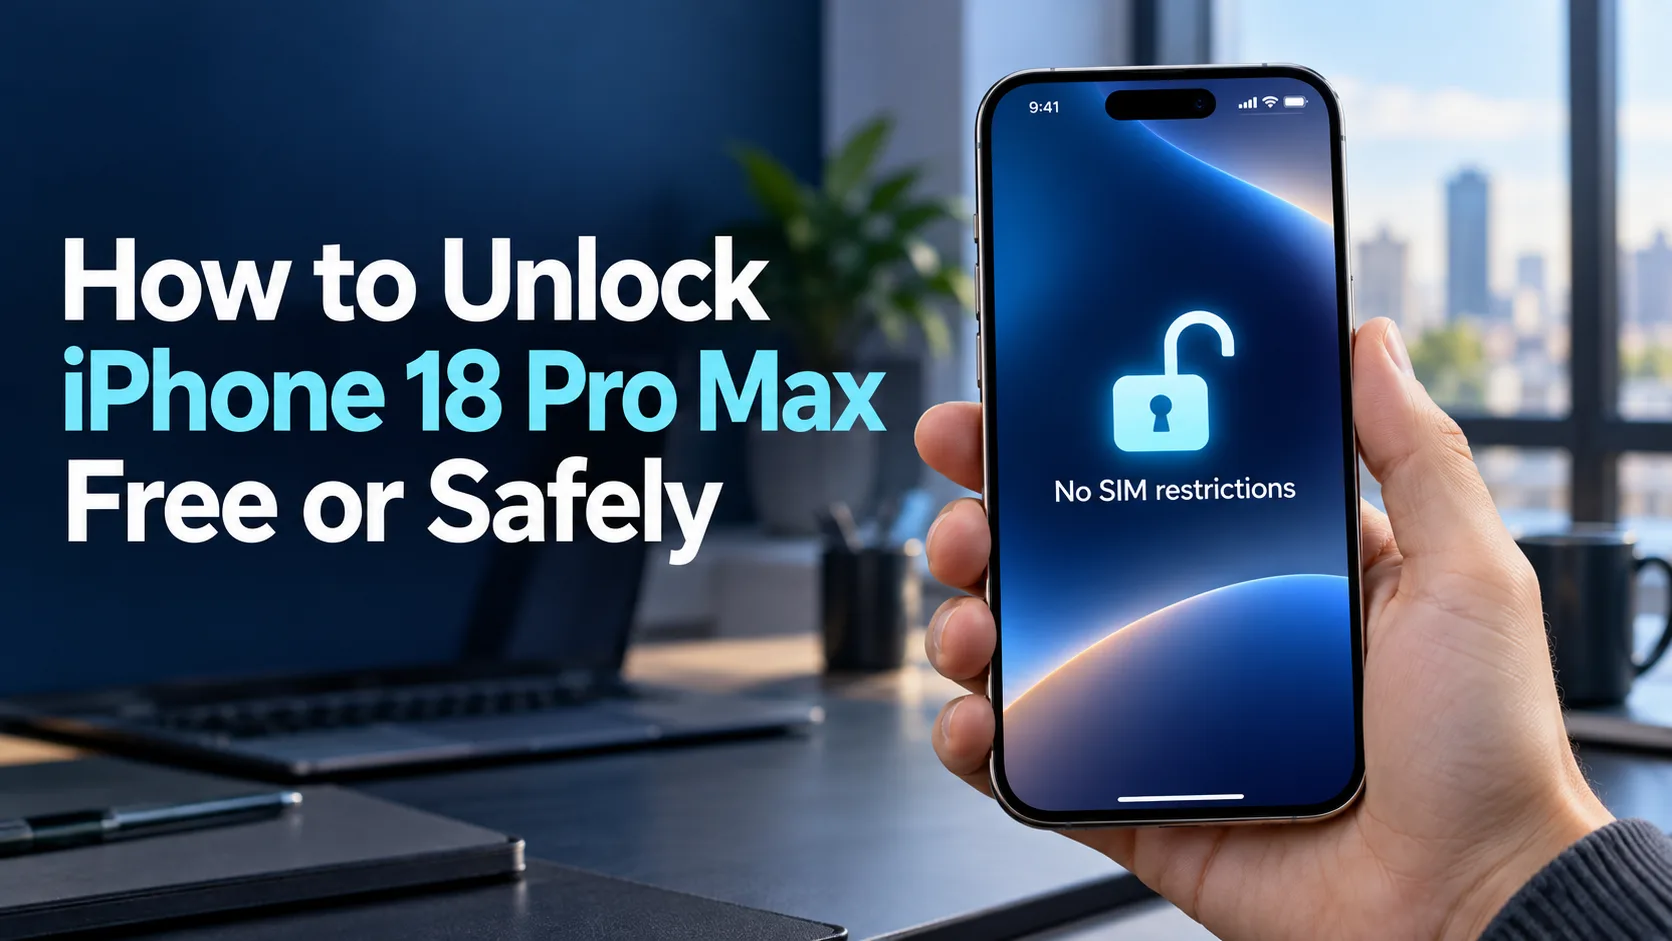
If you can reach Settings, check Settings > General > About > Carrier Lock. No SIM restrictions means the phone is unlocked. Apple’s carrier-unlock guidance explains that only the carrier can complete an unlock.
An unlocked status does not confirm that the new carrier has approved your device or activated your account. Ask that provider to check compatibility if you brought the phone from elsewhere.
Back Up Before Moving Your Data
On your old iPhone, follow these steps:
- Step 1: Connect to Wi-Fi and open Settings > [your name] > iCloud > iCloud Backup.
- Step 2: Tap Back Up Now and keep the phone connected.
- Step 3: Check the last backup date and time after it finishes.
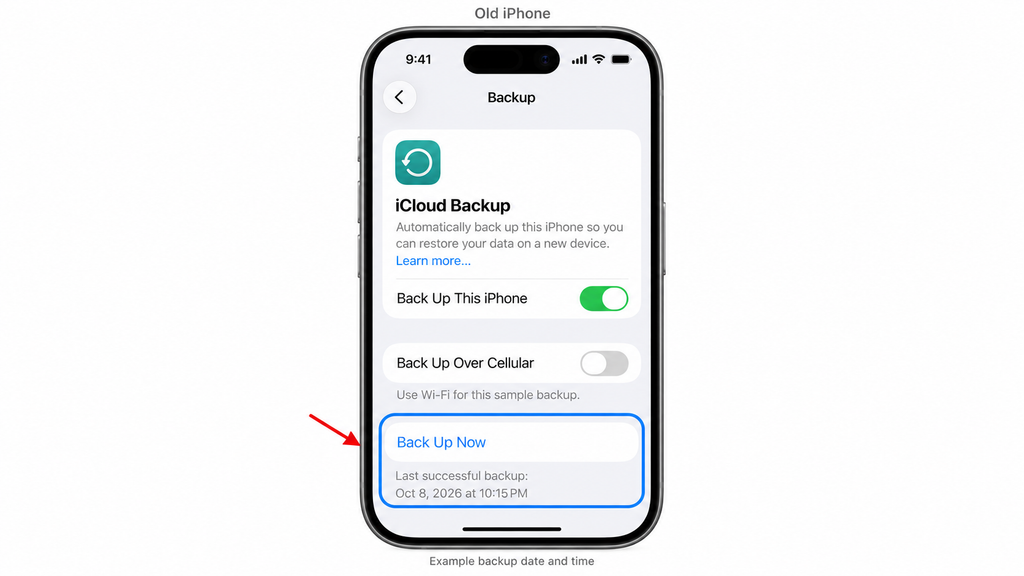
These are Apple’s official iCloud backup steps. Keep the old phone available until you have checked the new one.
If you bought a new iPhone and lack enough iCloud space for a backup, Apple offers temporary iCloud storage for eligible transfers. Start at Settings > General > Transfer or Reset iPhone > Get Started. You normally have 21 days to restore the temporary backup.
Part 2: Set Up Your iPhone 18 Pro or Pro Max
Choose one of the first three setup routes below. Then complete cellular activation and the final checks. Your iPhone may ask you to activate its eSIM before the data transfer begins.
| Your situation | Best starting route |
|---|---|
| You have your old iPhone | Quick Start |
| You have a backup but no working old iPhone | Manual setup, then restore the backup |
| You are switching from Android | Manual setup, then transfer from Android |
| You want a fresh start | Manual setup, then Don’t Transfer Anything |
1. Use Quick Start With Your Old iPhone
Use Quick Start when your old iPhone is available.
Keep the old phone powered on for this route. Update it to the latest iOS version it supports, connect it to Wi-Fi, and turn on Bluetooth.
- Step 1: Hold the new iPhone’s side button until the Apple logo appears. Begin the onscreen setup.
- Step 2: Place your unlocked old iPhone nearby and follow its prompt to set up the new phone.
- Step 3: Follow the pairing instructions and enter the old phone’s passcode when requested.
- Step 4: Connect the new phone to Wi-Fi and complete the security prompts.
- Step 5: Choose a direct device transfer or an iCloud download when offered.
- Step 6: Keep both phones near each other and plugged in until the transfer finishes.
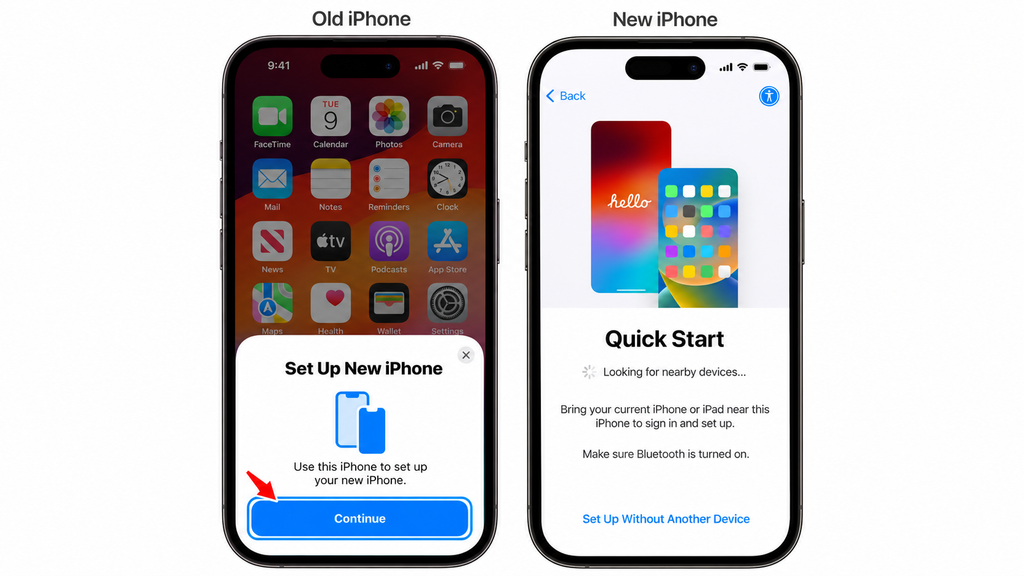
With a direct transfer, both phones stay occupied until migration ends. An iCloud download lets apps and data continue downloading in the background. Apple’s Quick Start guide explains these choices.
If the setup prompt disappears, restart both phones and try again.
2. Set Up Manually or Restore a Backup
Use manual setup if you do not have another iPhone nearby or want to start fresh.
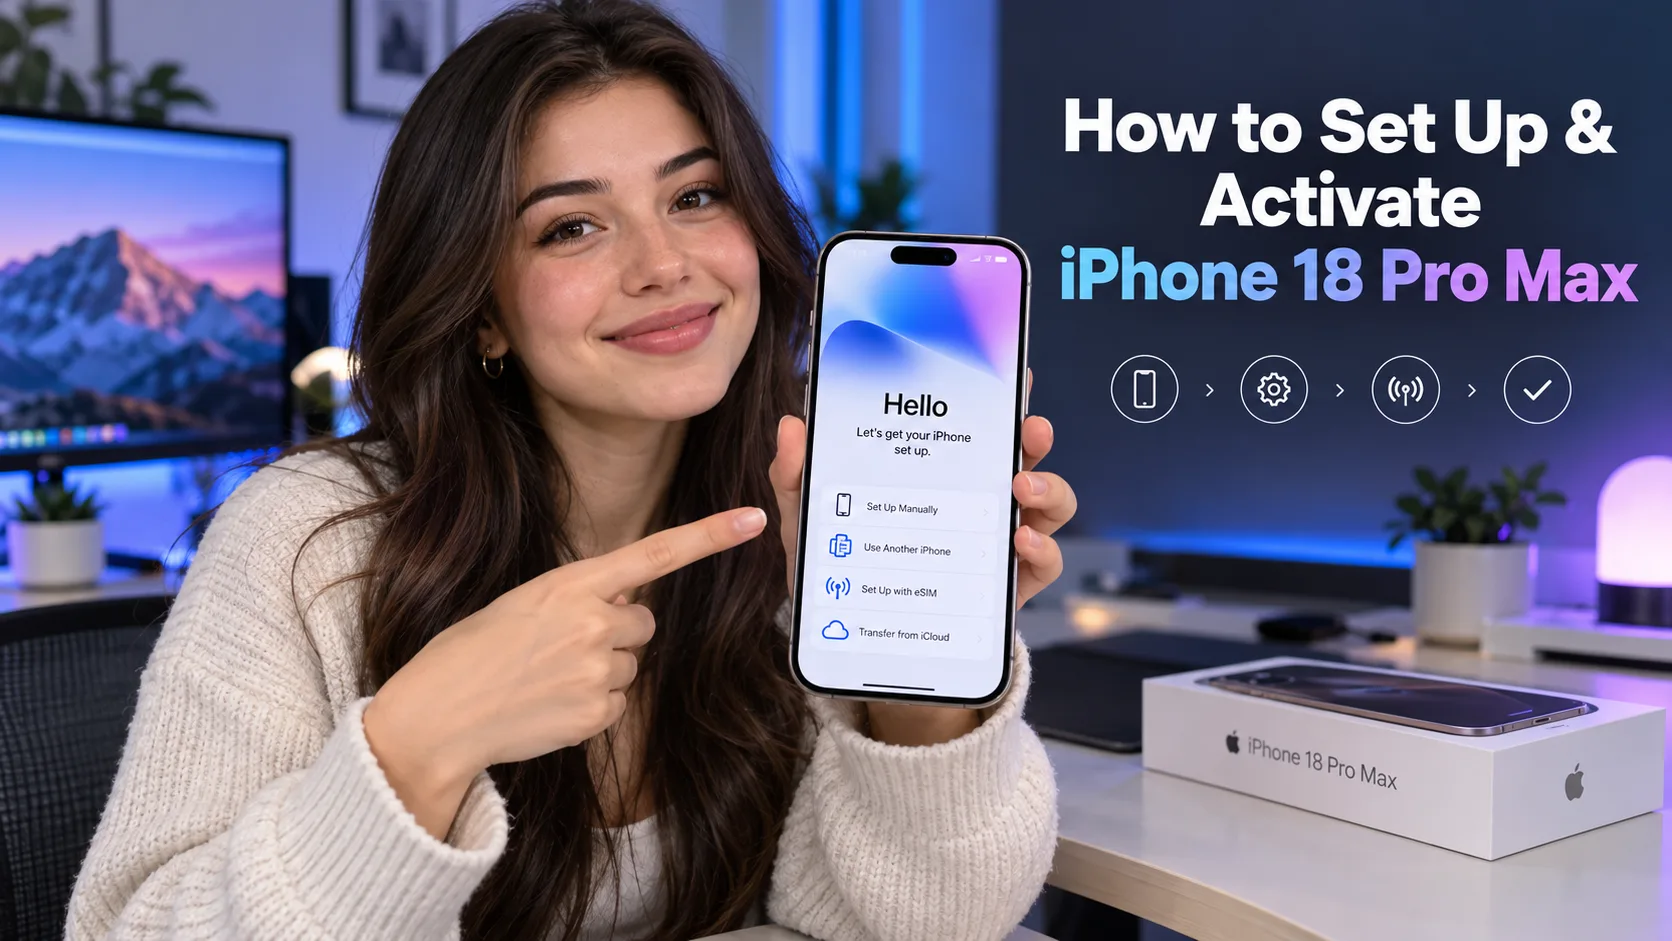
- Step 1: Turn on the iPhone, swipe up from Hello, and choose your language and country or region.
- Step 2: Select your preferred text and icon size, then tap Continue.
- Step 3: At Quick Start, tap Set Up Without Another Device.
- Step 4: Join Wi-Fi and follow the activation, privacy, age-range, Face ID, and passcode prompts.
- Step 5: On Transfer Your Apps & Data, choose your source or Don’t Transfer Anything.
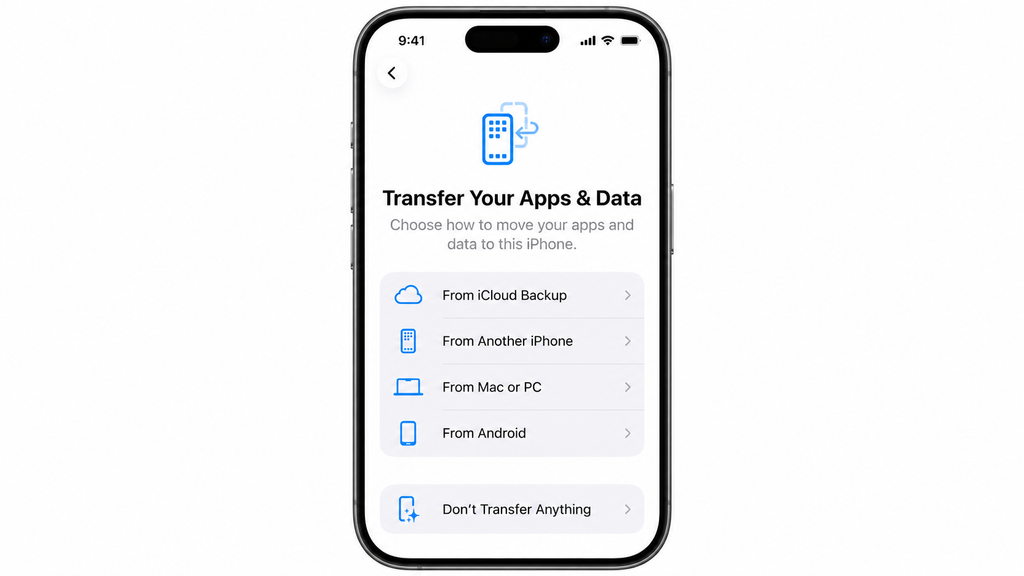
Follow the route shown on your phone; some screens vary with the software version and carrier. Apple’s iPhone setup guide covers the standard sequence.
For an iCloud backup: Choose From iCloud Backup, sign in, and select the correct backup by date and size. Keep Wi-Fi connected while the restore runs.
For a computer backup: Choose From Mac or PC, connect the iPhone to the computer holding the backup, and open Finder on Mac or Apple Devices on Windows. Select your phone, choose Restore Backup, and provide the encrypted backup password if requested.
Apple’s computer-transfer instructions explain this process. Health and Activity data require an encrypted computer backup.
Restoring a full backup after you finish setup requires erasing the new phone first. That removes its current data. Save anything newly created before restarting the process, as Apple explains in its backup restoration guide.
3. Transfer From Android
Use Apple’s Move to iOS route during initial setup. Check that the content you want to move fits on the new iPhone.
- Step 1: On the iPhone’s Transfer Your Apps & Data screen, choose From Android, then Transfer with App.
- Step 2: Open Move to iOS on the Android phone and complete its permission prompts.
- Step 3: Enter the code displayed by the iPhone on the Android device.
- Step 4: Join the temporary transfer network when asked, select your content, and begin.
- Step 5: Leave both devices connected to power until the iPhone’s progress bar finishes.
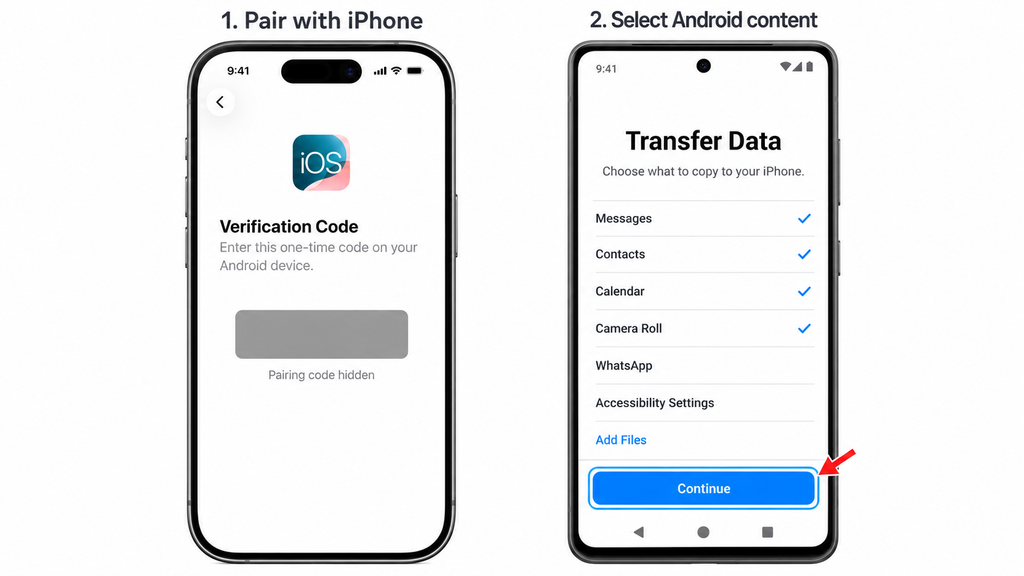
Apple also supports transfer without the app on certain compatible Android 17 devices. Check its Android-to-iPhone transfer guide for that option and supported content.
Afterward, inspect contacts, messages, and photos. Download missing apps and handle content that needs a manual move.
Your Android phone’s eSIM may need a separate carrier transfer. Apple’s Android eSIM guidance makes clear that direct transfer depends on the devices and carrier.
4. Activate or Transfer Your eSIM
Use the activation route your carrier provides. You do not need to try every method.
If Your Carrier Already Assigned an eSIM
A phone purchased with service may already have an eSIM waiting to install.
- Step 1: Follow the cellular activation prompt during setup and confirm the correct phone number.
- Step 2: If setup is finished, open Settings > Cellular > Set Up Cellular or Add eSIM.
- Step 3: Continue with the assigned plan and complete any carrier verification.
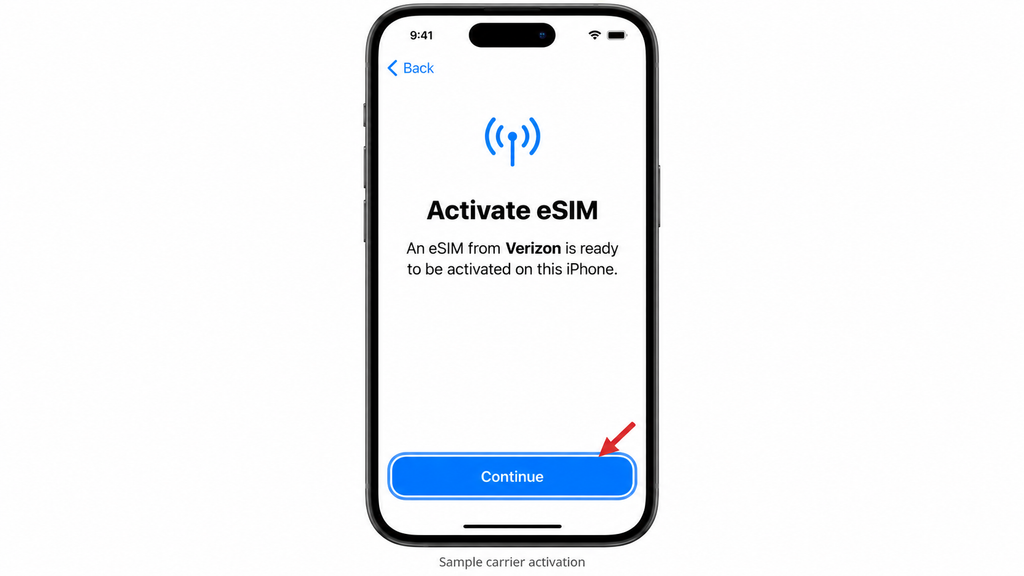
Apple’s cellular setup instructions describe carrier-assigned activation.
For Verizon, follow the iPhone 18 Pro and Pro Max activation guide supplied for these models. If the expected plan is missing, use Verizon’s activation support to check the line and device assignment.
If You Are Moving Service From Another iPhone
With a carrier that supports eSIM Quick Transfer, you can move your existing physical SIM or eSIM service to the new phone.
Apple currently requires both iPhones to run iOS 18.4 or later, use your Apple Account, and remain nearby with Bluetooth on. Unlock the old phone with its passcode.
- Step 1: On the new phone, open Settings > Cellular > Add eSIM.
- Step 2: Choose the number offered or tap Transfer From Nearby iPhone.
- Step 3: Approve the transfer on the old phone and complete any carrier webpage prompt.
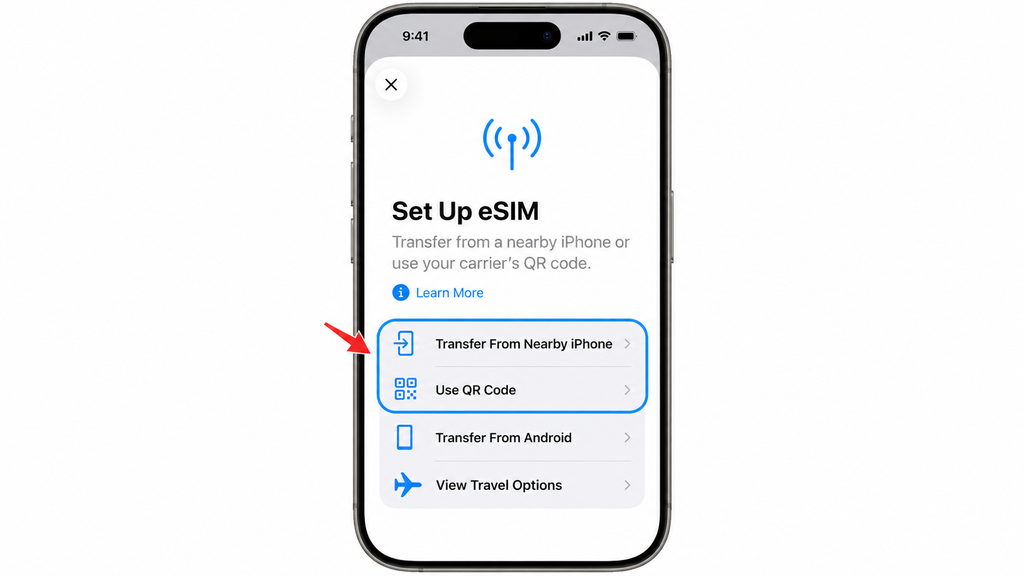
When the new plan activates, the previous SIM stops working for that line. If the old phone cannot meet the requirements, contact your carrier for another activation route. See Apple’s eSIM Quick Transfer instructions.
If Your Carrier Sent a QR Code
A QR code contains the information needed to install the carrier’s eSIM profile.
- Step 1: Display the carrier-issued code on another screen or print it.
- Step 2: Open Settings > Cellular > Add eSIM > Use QR Code. Tap Other Options first if needed.
- Step 3: Scan the code and follow the installation prompts, including any carrier confirmation code.
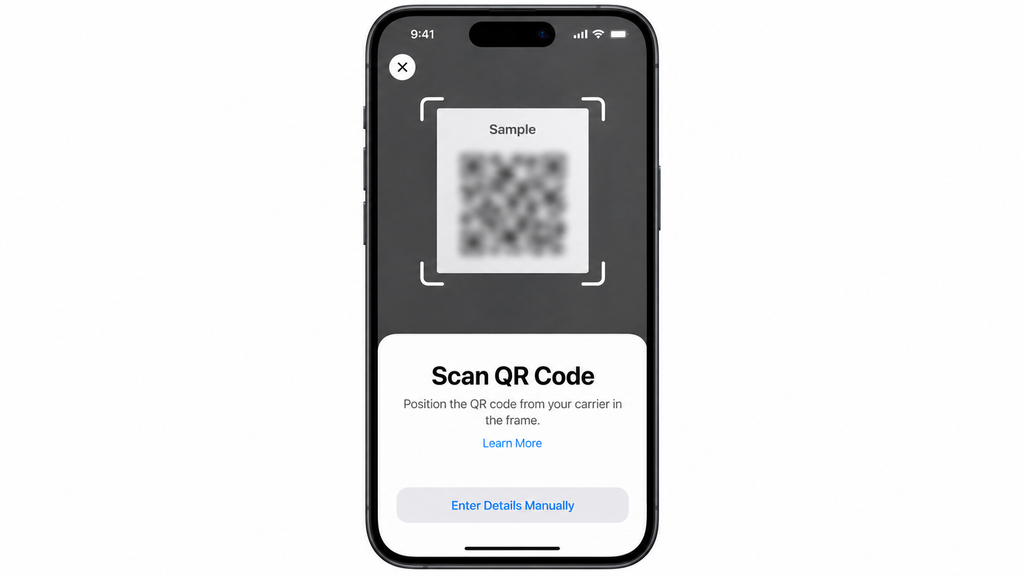
Lyca Mobile’s iPhone 18 eSIM guide describes QR-code activation. Use the code issued for your order, and contact the carrier if installation fails.
A successfully installed profile still needs working service. Continue with the checks below.
5. Finish Security Settings and Test Your Line
Finish any Apple Account sign-in and verification prompts. Confirm that Face ID and a passcode are set up, then review optional services and automatic-update choices.
Turn on Find My iPhone at Settings > [your name] > Find My > Find My iPhone. Apple’s Find My setup guide also explains Find My network and Send Last Location.
Now check the service:
- Step 1: Open Settings > Cellular and confirm that the intended line is turned on.
- Step 2: Call someone and ask them to call your number back.
- Step 3: Send and receive a regular text message.
- Step 4: Turn Wi-Fi off briefly and open a webpage using cellular data.
- Step 5: Turn Wi-Fi back on and check important transferred files and apps.
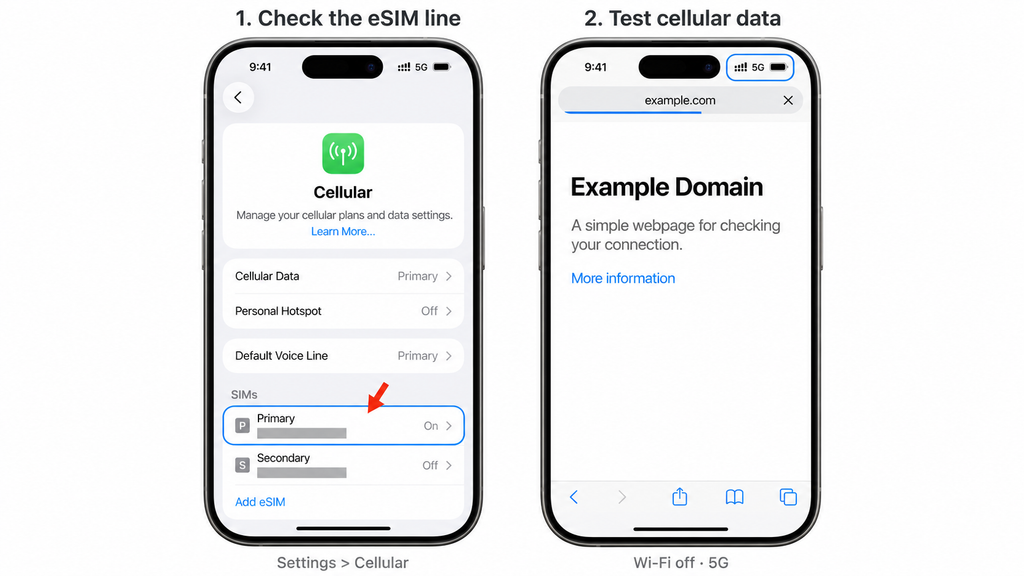
An iMessage exchange over Wi-Fi alone does not verify ordinary texting. If you are porting to Verizon, its number-transfer guidance notes that incoming calls may remain unavailable until the switch finishes.
How Long Does Setup and Activation Take?
There is no single completion time. Direct transfers depend on data size and connection conditions. A backup restore may let you reach the Home Screen while apps and photos continue downloading. Give those downloads time before deciding that content is missing.
Bonus Tips: Fix Activation Problems and Protect Your Data
If Your iPhone Shows SOS or No Service
Start with these simple checks:
- Step 1: Turn Airplane Mode on, then off.
- Step 2: Open Settings > Cellular. If your number appears, turn that line off and back on.
- Step 3: Restart the iPhone.
- Step 4: Open Settings > General > About and check for a carrier settings update.
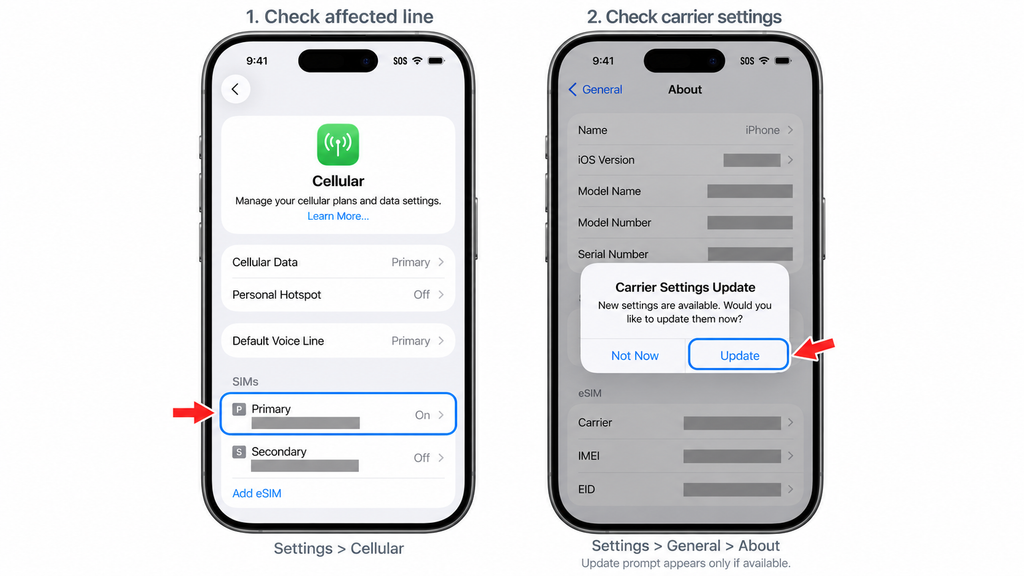
If the problem continues, give your carrier the exact error and the phone’s IMEI or EID from About. These identify the device and its eSIM hardware. Apple lists these steps in its eSIM troubleshooting guide.
If You Cannot Pass the Activation Screen
For an unavailable activation server, use reliable Wi-Fi, restart, and retry after a short wait. Apple’s activation troubleshooting guide also recommends checking Apple System Status.
If a used phone says iPhone Locked to Owner, contact the seller to resolve the linked ownership account or return the phone. Apple’s preowned iPhone guidance explains this Activation Lock warning, which is separate from a carrier lock.
Avoid Deleting Your eSIM as a First Fix
Do not erase the eSIM unless your carrier directs you to. Apple’s eSIM deletion guidance warns that you will need to contact the carrier for a replacement.
Keep your old phone and backup until you have confirmed both data and service on the new device.
The Bottom Line
For most iPhone upgrades, start with Quick Start and use the eSIM route your carrier supports. If you are restoring a backup or switching from Android, select that option during initial setup.
Before putting the old phone away, test incoming calls, regular texts, and cellular data on your iPhone 18 Pro or Pro Max. Then check your important content. If service fails, contact the carrier with the exact error and device details so it can investigate the activation.
Sometimes, if Continue Without Wi-Fi is offered and a supported cellular connection is available. Wi-Fi is the more reliable starting point, especially when you need to download an eSIM or restore data.
Yes. Choose Set Up Without Another Device, then restore an available backup or select Don’t Transfer Anything. Contact your carrier to activate the line if you cannot approve a nearby-phone transfer.
You can choose to set it up later during ordinary new-device setup. Apple services such as iCloud and the App Store require account access. Restoring an iCloud backup also requires the account associated with that backup.
That is Activation Lock, which links the phone to an owner’s Apple Account. A new eSIM will not remove it. If it belongs to a previous owner, ask the seller to resolve the account link; Apple’s Activation Lock guidance explains why an erased device may still be locked.
Not if you transfer the existing line or complete an eligible number port. Confirm the number during activation. Starting a separate new line can give you a different number.