Your step-by-step guide to activating eSIM on any device — whether you’re using an iPhone, Samsung Galaxy, or Google Pixel with AT&T, T-Mobile, or Verizon.
TL;DR Quick Answer:
Yes, you can activate an eSIM by yourself! Go to your phone’s Settings, find the cellular or SIM settings, and select “Add eSIM” or “Add Cellular Plan.” You’ll either scan a QR code from your carrier, use their app, or enter activation details manually. The entire process takes just a few minutes once you have your carrier information ready.
An eSIM (embedded SIM) is a digital SIM built right into your phone. Instead of fiddling with tiny plastic cards, you can activate cellular plans instantly through your device settings. Pretty much every phone released in the past few years supports eSIM technology, and starting with iPhone 14 models sold in the US, Apple has gone all-in on eSIM-only devices.
Whether you just got a new phone, switching carriers, or adding a second line for travel, this guide walks you through everything you need to know about activating your eSIM.
iPhone vs Android eSIM Comparison
| Feature | iPhone | Samsung Galaxy | Google Pixel |
|---|---|---|---|
| eSIM Support Since | iPhone XS/XR (2018) | Galaxy S20 Series (2020) | Pixel 2 (2017) |
| Max eSIM Profiles | 8+ profiles stored | 5+ profiles stored | Up to 10 profiles |
| Dual SIM Support | ✓ eSIM + Physical SIM | ✓ eSIM + Physical SIM | ✓ eSIM + Physical SIM |
| eSIM Quick Transfer | ✓ iOS 16+ | Limited carrier support | Carrier dependent |
| Settings Path | Settings → Cellular | Settings → Connections → SIM Manager | Settings → Network & Internet → SIMs |
| eSIM-Only Models | iPhone 14+ (US models), iPhone 17 Air | None currently | None currently |
How to Activate eSIM on iPhone
Apple makes eSIM activation pretty straightforward. You’ve got several options depending on how you’re getting your eSIM plan — whether that’s through a QR code, your carrier’s automatic setup, or converting an existing physical SIM.
1. Activate eSIM by Scanning a QR Code
This is the most common method. Your carrier will provide a QR code either on paper, via email, or displayed on their website.
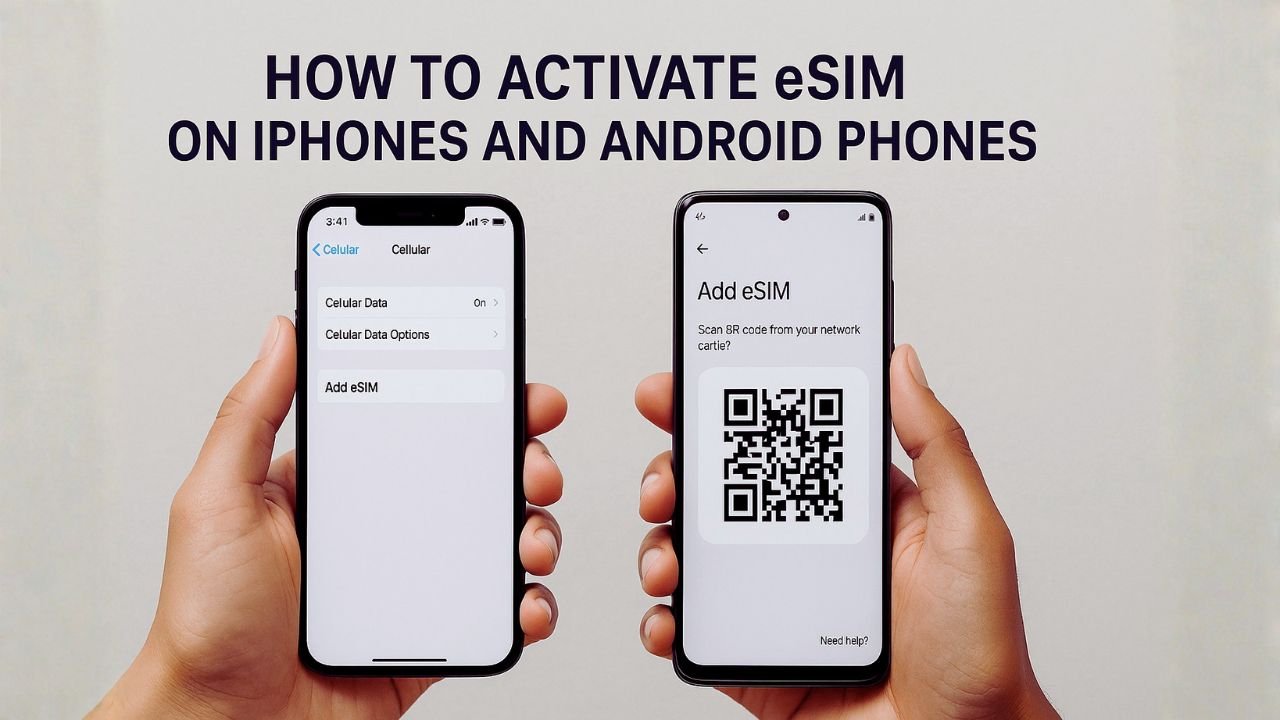
- Open Settings on your iPhone
- Tap Cellular (or Mobile Data in some regions)
- Tap Add eSIM or Set Up Cellular
- Select Use QR Code
- Position your iPhone so the QR code appears in the frame
- If prompted, enter any confirmation code from your carrier
- Tap
Continueand wait for activation to complete
2. Add eSIM Manually (Without Camera)
If you can’t scan the QR code, you can enter the activation details manually using the SM-DP+ address and activation code.
- Go to Settings → Cellular
- Tap Add eSIM
- Select Use QR Code, then tap Enter Details Manually
- Enter the SM-DP+ Address provided by your carrier
- Enter the Activation Code
- Tap Next and wait for the eSIM to download
3. Convert Physical SIM to eSIM
If your carrier supports it, you can convert your existing physical SIM card to an eSIM without changing your number or plan.
- Open Settings → Cellular
- Tap Set Up Cellular or Add eSIM
- Choose the phone number with a physical SIM
- Tap Convert to eSIM
- Follow the on-screen instructions
- Your physical SIM will be deactivated once the eSIM activates
5. eSIM Quick Transfer (iPhone to iPhone)
Got a new iPhone? You can transfer your eSIM from your old iPhone without contacting your carrier.
- Place both iPhones close together
- On your new iPhone, go to Settings → Cellular
- Tap Set Up Cellular or Add eSIM
- Choose Transfer From Nearby iPhone
- Follow the prompts on both devices
- Your old SIM will be deactivated when the transfer completes
When you buy an iPhone directly from a carrier, they often pre-assign an eSIM to your device. During initial setup, you’ll see a notification saying “Carrier Cellular Plan Ready to Be Installed” — just tap it and follow the prompts.
How to Activate eSIM on Android
Android eSIM activation varies slightly depending on your phone manufacturer, but the general process is similar across devices. Here’s how to get set up on Samsung Galaxy and Google Pixel phones.
Samsung Galaxy eSIM Setup
1. Samsung eSIM via QR Code
The most reliable method for Samsung devices. Works on Galaxy S21 and newer, Z Fold/Flip series.
- Open Settings on your Samsung
- Tap Connections
- Tap SIM Manager (or SIM card manager)
- Under eSIMs, tap + Add eSIM
- Select Scan QR code from service provider
- Point your camera at the QR code
- Tap Add when the plan is detected
- Give your eSIM a label for easy identification
2. Samsung eSIM via Activation Code
If you can’t scan the QR code, manually enter your activation details.
- Go to Settings → Connections → SIM Manager
- Tap + Add eSIM
- Select Scan QR code from service provider
- Tap Enter activation code below the scan box
- Enter the SM-DP+ address and activation code
- Tap Connect and wait for download
Google Pixel eSIM Setup
1. Pixel eSIM via QR Code
Works on Pixel 2 and all newer Pixel phones including Pixel 7, 8, and 9 series.
- Open Settings
- Tap Network & internet
- Tap SIMs (you may see a + icon)
- Tap Download a SIM instead or Add eSIM
- Tap Next on the eSIM explanation screen
- Select QR code
- Scan the QR code from your carrier
- Confirm the download when prompted
2. Pixel eSIM Manual Entry
Enter activation details manually if QR scanning isn’t an option.
- Go to Settings → Network & internet → SIMs
- Tap Add eSIM or the + icon
- On the QR code screen, tap Need help?
- Select Enter it manually
- Type in the activation code from your carrier
- Tap Continue to complete setup
If your data isn’t working after activation, go to Settings → Network & internet → SIMs → [Your eSIM] → Access Point Names and make sure the correct APN is selected or configured for your carrier.
eSIM Compatible Devices (2026)
Not sure if your phone supports eSIM? Here’s a quick reference of popular devices that work with eSIM technology. Remember, your device also needs to be carrier-unlocked to use eSIMs from different providers.
Devices sold in mainland China, Hong Kong, and Taiwan typically don’t support eSIM functionality. Some carrier-locked phones may also have eSIM disabled. Always verify with your specific model before purchasing an eSIM plan.
Android eSIM Activation by Carrier
AT&T eSIM on Android
- Sign into your AT&T account online or via the my AT&T app
- Navigate to My devices and find your phone
- Click Manage, then Options & Settings
- Select Get a new eSIM
- Follow the prompts to receive your QR code
- On your Android, go to Settings → Connections → SIM Manager
- Tap Add mobile plan and scan the QR code
T-Mobile eSIM on Android
T-Mobile’s T-Life app makes eSIM management easier on Android devices.
- Download the T-Life app from the Play Store
- Connect to the T-Mobile network or Wi-Fi
- Select the
Managetab and choose your line - Tap SIM transfer or activation → Get Started
- Enter your device’s IMEI number
- Follow the prompts to activate your eSIM
- For Samsung: Settings → Connections → SIM manager → Add eSIM
- For Pixel: Settings → Network & Internet → SIMs → Add SIM
Verizon eSIM on Android
- Download the My Verizon app
- Sign in to your account
- Go to the Mobile tab
- Select Get SIM or Activate or get SIM
- Follow the on-screen prompts
- For Samsung Galaxy: Settings → Connections → SIM Manager
- For Pixel: Settings → Network & Internet → Mobile Network
- Tap the + to add a new network and download your SIM
If you’re bringing an Android eSIM device to an existing Verizon line, you may need to call customer service at (800) 922-0204 rather than using the app.
After Activation: Quick Checks
Once you’ve added your eSIM, run through these quick checks to make sure everything’s working properly:
If all checks pass, your eSIM is fully activated and ready to use. Remember that it can take up to 15 minutes for your phone to fully connect to the network after activation.
iPhones support Dual SIM functionality, letting you use both an eSIM and a physical SIM card simultaneously. Simply insert your physical SIM into the SIM tray, then add your eSIM through Settings → Cellular → Add eSIM. Once both are active, you can choose which line to use for calls, texts, and data in Settings → Cellular → Cellular Data and Default Voice Line. You can even set rules for which SIM to use with specific contacts.
Absolutely! Self-activation is one of the biggest advantages of eSIM technology. Once you have your QR code or activation details from your carrier (available through their app, website, or email), you can complete the entire activation process yourself through your phone’s settings. No store visit or phone call required. The whole process typically takes less than 5 minutes.
Yes, most modern smartphones support Dual SIM Dual Standby (DSDS), which means both your eSIM and physical SIM can be active simultaneously. You can receive calls and texts on either number, though only one can be actively used for data at a time. This is perfect for keeping work and personal numbers separate, or using a local SIM while traveling abroad while keeping your home number active.
If you’re switching from Android to iPhone, you’ll typically need to contact your carrier to transfer your eSIM. With iOS 16 and later, some carriers support direct eSIM transfer — on your new iPhone, go to Settings → Cellular → Set Up Cellular → Other Options → Transfer from Android. Place your Android phone nearby and follow the prompts. If this option isn’t available, your carrier can deactivate the eSIM on your Android and issue a new one for your iPhone.
For manual eSIM activation on Android without scanning a QR code: On Samsung, go to Settings → Connections → SIM Manager → Add eSIM → Scan QR code → Enter activation code. On Pixel, go to Settings → Network & Internet → SIMs → Add eSIM, then tap “Need help?” and select “Enter it manually.” You’ll need the SM-DP+ address and activation code provided by your carrier.
Direct eSIM transfer between iPhone and Android isn’t as seamless as transferring between two iPhones. You’ll generally need to contact your carrier to transfer your eSIM between platforms. They’ll deactivate the eSIM on your old device and issue a new QR code or activation for your new device. Some carriers are starting to support cross-platform transfers through their apps, so check with your specific carrier for the easiest method.
The information provided in this guide is for educational purposes only and is accurate as of the publication date. eSIM activation steps, carrier policies, and device compatibility may vary by region and are subject to change without notice. Always verify current procedures directly with your carrier (AT&T, T-Mobile, Verizon, or others) before proceeding. Unloky.com is not affiliated with Apple, Samsung, Google, or any mobile carrier mentioned in this article. We are not responsible for any issues, charges, or service disruptions that may occur during the eSIM activation process. If you encounter problems, please contact your carrier’s customer support for assistance.